
For app builders
Change the stages of a Workflow app
Add, rename, recolour, reorder and delete the stages on a Workflow app’s board.
The screenshots show the English interface. The buttons are in the same places, and most are labelled in your language.
Stages are the columns on a Workflow app’s board, the steps a card moves through. You can add, rename, recolour, reorder and remove them.
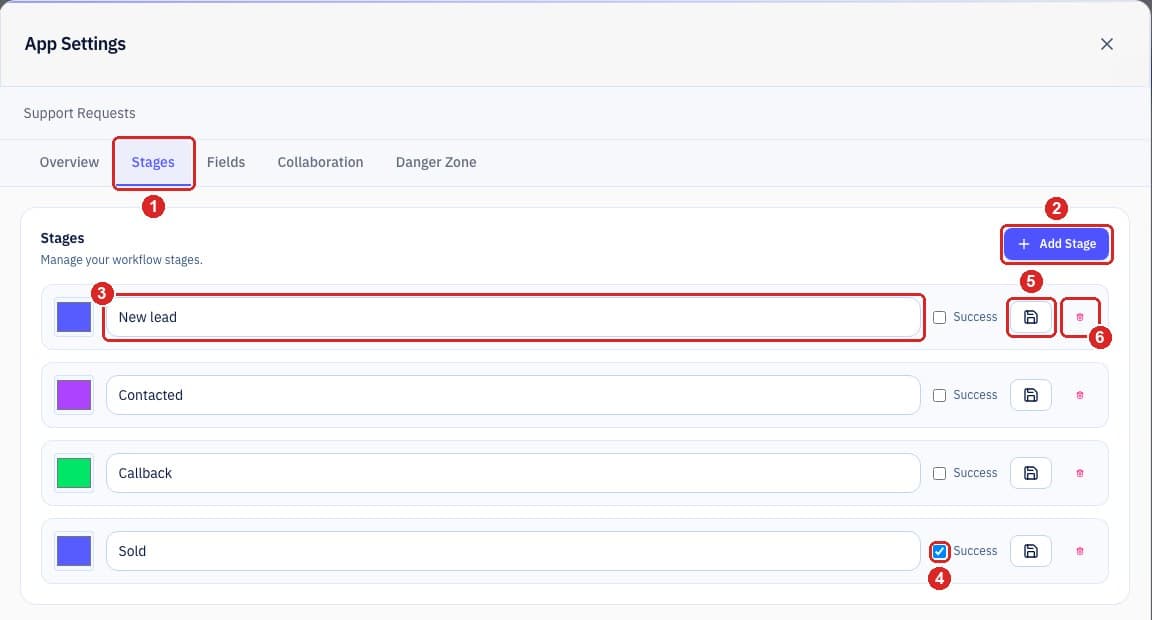
- 1Open the app, choose Settings, then the Stages tab.
- 2Add Stage adds a new row at the bottom.
- 3Type the stage name. Click the colour square to change its colour.
- 4Tick Success on a stage that means a win. Vellumica celebrates with confetti when a card moves there.
- 5Click the save icon on the row after every change, including a new stage. A “Stage updated” message confirms a change and “Stage created” confirms a new stage.
- 6The bin icon deletes the stage. Read the warning below before you use it.
Save each rowA change is not kept until you click the save icon on its row. A stage you add with Add Stage disappears if you close the window before saving it.
Reorder, rename or delete from the board
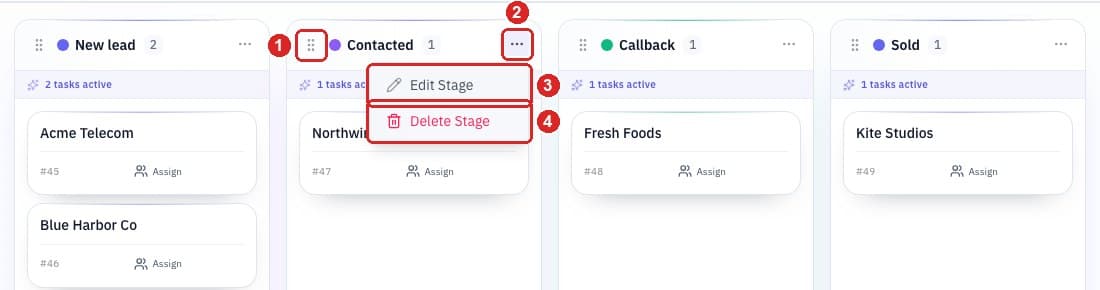
- 1Drag the handle to move a stage left or right.
- 2Open the three-dot (…) menu.
- 3Edit Stage opens a window to change the stage.
- 4Delete Stage removes the stage.
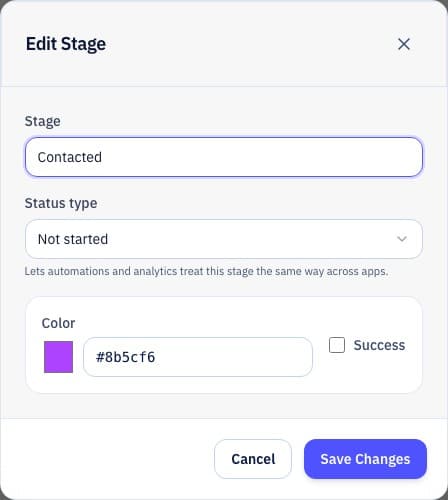
Edit Stage
Change the name and colour, and tick Success for a winning stage. Status type (Backlog, Not started, Active, Done or Cancelled) lets automations and analytics treat the stage the same way across apps. Choose Save Changes when you are done.
Delete Stage
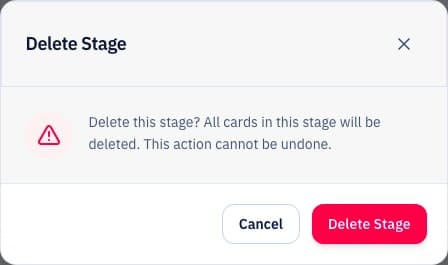
Deleting a stageDeleting a stage deletes every card in it, and it cannot be undone. To keep the cards, drag them to another stage first.
Who can do thisOwners, admins and members can edit a Workflow app’s stages by default, if they can edit that app. Viewers cannot.
Related guides
Need more help?
Our team is happy to help.